
How do I assign Admin rights to a user?
ClickHSE allows you to give Users further Administrator rights should you wish them to access the management side of the platform. To do this first you will need to login to your Administrator dashboard to access the Reporting and management tools.
Login to your Admin Dashboard and go to User Management > View/Add Administrators

This action will display the following screen
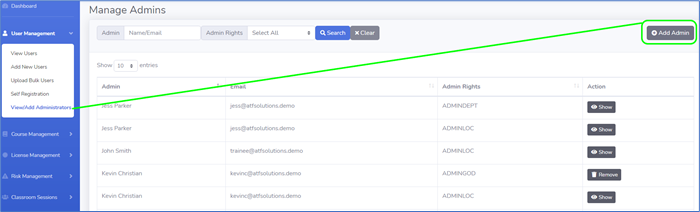
From here you can see all existing administrators and their current admin rights (i.e. ADMIN DEPT, ADMIN LOC or ADMINGOD etc)
To add a new CLickHSE Administrator , click on the ‘Add Admin’ button on the right.
When you click ‘Add Admin’, you will see a popup screen showing a list of registered users

You can use the filters to search for an individual, or select from the list of users displayed.
In this example we will select Adrian P.
Click ‘Assign’ and this will display a list of pre-selected Administrator options giving different levels of access to ClickHSE.
You can now select the correct Admin rights level you wish to assign to the user. Before assigning Admin rights carefully read the detail for each option.

In this example Adrian P is the branch manger for the Worcester offices and we wish to give him Admin rights to access data for his location (Worcester).

If you need to give access to multiple locations simply click ‘Assign’ for each location required.
The user (Adrian P in this example) now has access to their own Admin Dashboard with access to the relevant chosen data.
Important note - SuperAdmin level gives the user access to all data and should be infrequently.